Cava Falafel Recipe
I’ll be honest – I resisted making my own cava falafel recipe for months, convinced it would never match the real thing. Then one rainy Tuesday, too lazy to drive anywhere, I finally soaked a batch of dried chickpeas overnight just to see what would happen.
The next day, standing over my food processor with fistfuls of cilantro, parsley, and dill, my whole kitchen turned into something between a spice market and a garden. When that first falafel hit hot oil and turned deep gold with a shattering crust, I knew I’d cracked it.
Since then, this has become my go-to copycat CAVA falafel recipe-and honestly, it beats takeout on flavor, freshness, and cost, especially when served with warm pita, tahini sauce, and saffron rice.
What Is Cava Falafel and Why Do Fans Love It?
Falafel, at its core, is a deep-fried patty made from ground legumes – usually chickpeas or fava beans – bound together with herbs, garlic, and warm spices.
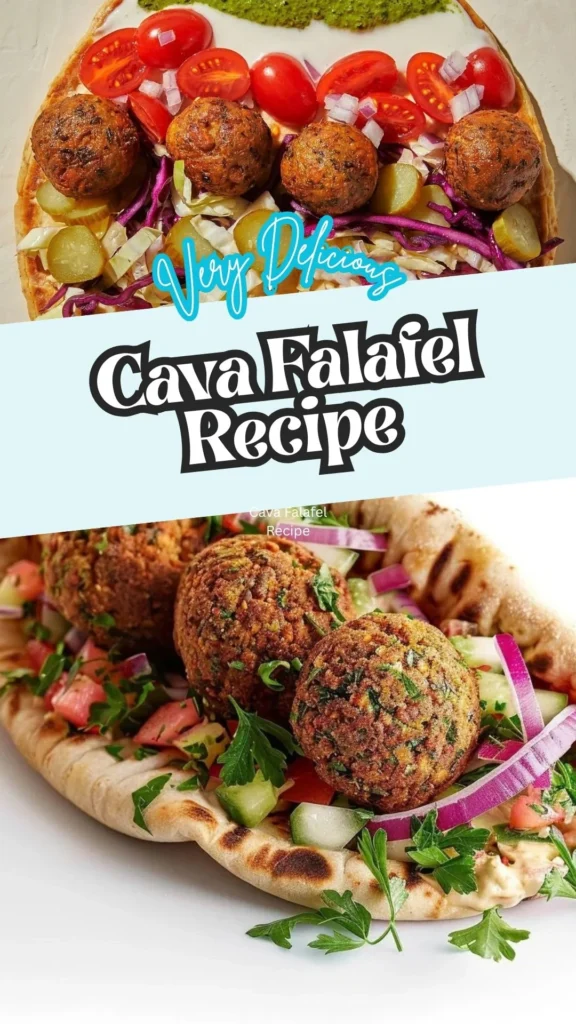
What makes a cava falafel recipe stand out from typical Middle Eastern falafel is its color and texture: it’s almost neon green inside, thanks to a heavier hand with fresh herbs like parsley, cilantro, and dill. The flavor profile leans bright and grassy rather than heavily cumin-forward, with a crispy, craggy exterior and a soft, slightly fluffy interior.
Compared to drive-thru fast-casual proteins, it’s plant-based, protein-rich, and endlessly customizable. Fans love it because it delivers big flavor without feeling greasy, and it holds up beautifully in a bowl, wrap, or salad without turning mushy.
The Nostalgic History Behind This Food
Falafel’s roots stretch back centuries across the Middle East and North Africa, with Egypt and the Levant both claiming its origin story. Traditionally, it was street food – cheap, filling, and sold from carts long before “fast casual” was a concept.
Older recipes leaned on canned or overcooked chickpeas, which is why so many homemade versions turned out dense or gummy. A proper cava falafel recipe, like the fast-casual chains that popularized it in the U.S., breaks from that habit by insisting on dried, soaked chickpeas rather than canned.
This single distinction – soaked versus cooked chickpeas – is what separates modern, herb-forward falafel from the heavier, browner falafel of decades past, and it’s the detail most home cooks miss.
Key Ingredients That Give This Food Its Signature Flavor
The magic of any cava falafel recipe comes down to a short list of ingredients used correctly. Dried chickpeas are non-negotiable – they soak up water slowly and hold their shape and starch structure, which canned chickpeas simply can’t replicate since they’re already cooked soft.
Baking soda added during the soak softens the chickpeas’ skins and helps them break down evenly in the food processor. A generous trio of greens – cilantro, parsley, and dill – is what gives cava-style falafel its bright green color and grassy, herbaceous flavor instead of the dull tan of traditional versions. Garlic adds pungent depth that mellows as it cooks.
Finally, baking powder is stirred in right before shaping, giving the falafel lift and a lighter, fluffier interior instead of a dense, hockey-puck texture. Together, these five ingredients do more work than a long spice cabinet ever could.
Cava Falafel Recipe Ingredients
Here’s what you’ll need for a batch of about 20–24 falafel balls:
- 2 cups dried chickpeas – Do not substitute canned chickpeas; they contain too much moisture and will turn your mixture into mush instead of a moldable paste.
- 1 teaspoon baking soda (for soaking) – Softens the chickpeas’ outer skins so they process evenly. Don’t skip this step.
- 1 cup fresh cilantro, roughly torn – Adds brightness and the classic green hue. Swap for extra parsley if you’re not a cilantro fan.
- 1 cup fresh parsley, roughly torn – Balances the cilantro and dill with a milder, slightly peppery flavor.
- 1/2 cup fresh dill, roughly torn – The ingredient most people forget, but it’s essential for that signature cava flavor. Reduce to 1/4 cup if you prefer a subtler herb taste.
- 6–8 cloves garlic, peeled – Adjust to taste; more garlic means a sharper, more pungent falafel.
- 1 small onion, roughly chopped (optional but recommended) – Adds moisture and sweetness as it breaks down.
- 1 tablespoon ground cumin – Warm, earthy backbone flavor.
- 1 teaspoon ground coriander – Complements the cumin with citrusy undertones.
- 1/2 teaspoon cayenne or crushed red pepper (optional) – For a subtle kick.
- Salt and black pepper, to taste
- 1 1/2 teaspoons baking powder – Stirred in just before shaping; gives the falafel a lighter, airier bite.
- Oil for frying (vegetable, canola, or avocado oil) – If baking or air frying instead, a light spray of oil will do.
Tools You Need to Make This Recipe at Home
- Large bowl (for soaking chickpeas)
- Food processor
- Rubber spatula or spoon
- Baking sheet or tray lined with parchment (for shaping/resting)
- Slotted spoon or spider strainer (for frying)
- Deep skillet, Dutch oven, or air fryer
- Paper towels (for draining)
Prep time: 20 minutes (plus 12–24 hours soaking and at least 1 hour resting)
Cook time: 15–20 minutes
Total active time: About 35–40 minutes
Steps to Make This Cava Falafel Recipe
1. Soak the chickpeas.
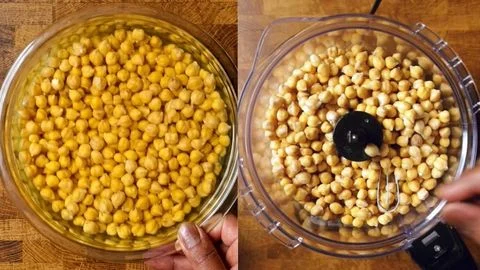
Place dried chickpeas in a large bowl, cover with several inches of cold water, and stir in the baking soda. Soak for a minimum of 12 hours, up to 24 hours. They should roughly double in size and soften but stay raw – do not cook them.
2. Drain and dry.
Drain the soaked chickpeas well and pat them dry with a clean towel to remove excess moisture.
3. Process the mixture.
Add the chickpeas, herbs, garlic, onion, and spices to a food processor.
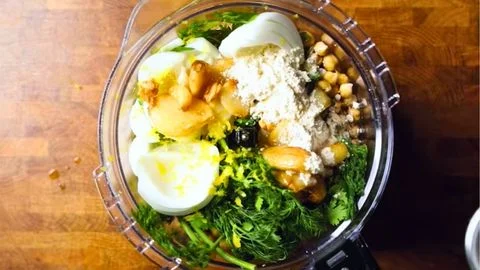
There’s no need to chop anything finely beforehand – just cut ingredients enough to fit in the bowl.
4. Pulse to the right texture.
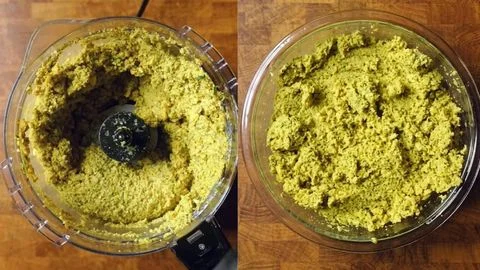
Pulse in short bursts, scraping down the sides as needed, until the mixture looks like a cross between coarse oatmeal and a paste. If it looks crumbly and dry, it’s under-processed; keep pulsing. It’s genuinely hard to over-process this into hummus, so don’t be afraid to run it a bit longer than you think.
5. Refrigerate the mixture.
Transfer the mixture to a bowl, cover, and refrigerate for at least 1 hour (longer is fine). Do not skip this step – resting lets the mixture hydrate fully, develop flavor, and become sticky enough to hold together.
6. Stir in baking powder.
Once rested, fold in the baking powder right before you’re ready to shape and cook.
7. Shape the falafel.
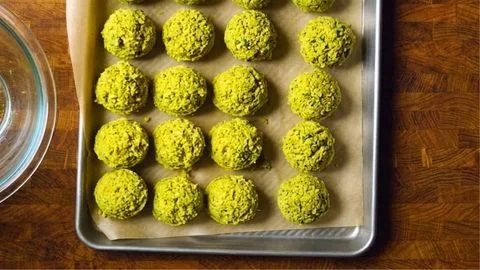
Form the mixture into balls or thick, hockey-puck-style patties – avoid flattening them like thin burgers, since that leads to dry, overcooked falafel. At this stage, you can freeze shaped falafel on a tray for later use.
8. Cook your falafel.
For the most authentic texture, fry in 2–3 inches of oil heated to 350°F (175°C) for 3–4 minutes, until deeply golden and crisp.
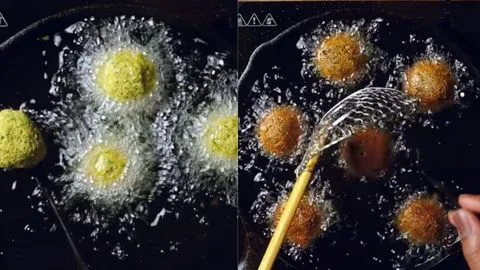
Alternatively, bake at 400°F (205°C) for 20–25 minutes, flipping halfway, or air fry at 375°F (190°C) for 12–15 minutes, shaking the basket halfway through.
9. Drain and serve
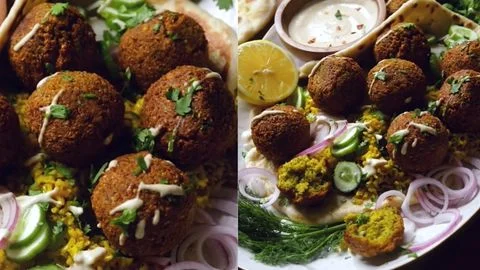
Transfer cooked falafel to a paper-towel-lined plate to drain excess oil before serving warm.
Pro Tips for Getting the Flavor Just Right
The single biggest mistake people make with any cava falafel recipe is using canned chickpeas – they hold too much water and will never crisp up properly, no matter how long you fry them. Always start with dried chickpeas and commit to the full soak time; shortcuts here show up later as gummy, falling-apart falafel.
Second, don’t skip the refrigeration step after processing. It feels optional, but that rest period is what allows the starches to relax and the mixture to bind – skip it, and your falafel will crumble apart in the oil. Third, pay attention to texture during processing: aim for a rough, sticky paste, not a smooth hummus and not a dry crumble.
If your mixture feels too wet to shape, add a tablespoon of chickpea flour rather than more dried herbs, which can throw off the balance. When frying, keep your oil temperature steady around 350°F – too hot and the outside burns before the inside cooks; too cool and the falafel absorbs excess oil and turns greasy.
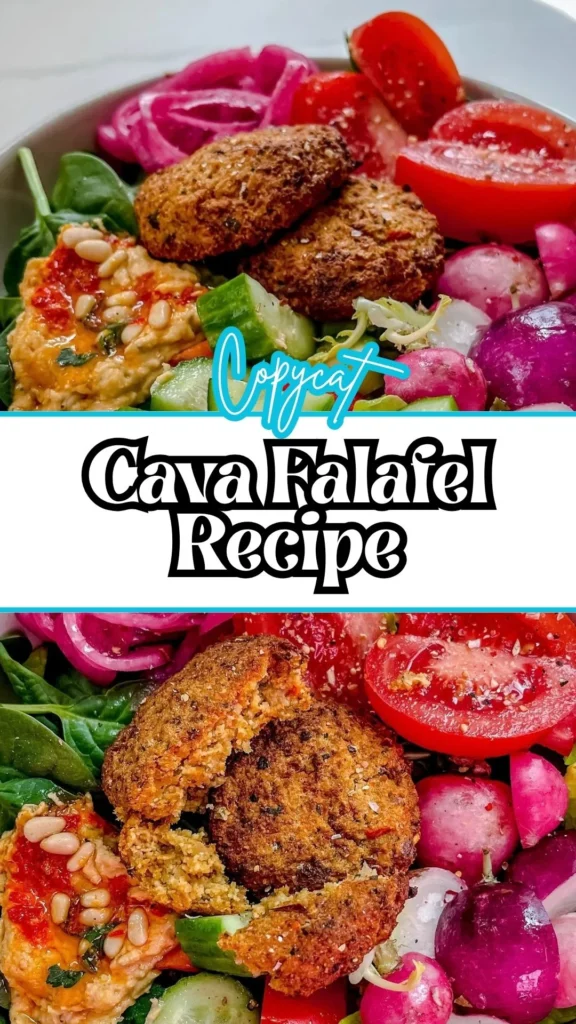
Finally, always shape into balls or thick pucks rather than flat patties; the rounder shape helps the exterior crisp while keeping the center soft and slightly fluffy, which is the texture fans specifically love about cava-style falafel.
Easy Variations to Customize This Food
One of the best things about a homemade cava copycat recipe falafel is how easy it is to adjust. Want it spicier? Increase the cayenne or add a diced jalapeño to the food processor. Prefer a milder herb flavor?
Swap the dill for extra parsley and reduce the cilantro by half. For a nuttier depth, stir in a tablespoon of tahini before shaping. If you’re avoiding fried food, baking or air frying both work well, though frying still delivers the crispiest crust.
You can also swap chickpeas for a mix of chickpeas and fava beans for a more traditional Middle Eastern flavor, or add finely grated zucchini for extra moisture and a subtle vegetable sweetness.
Best Ways to Use This Food in Your Meals
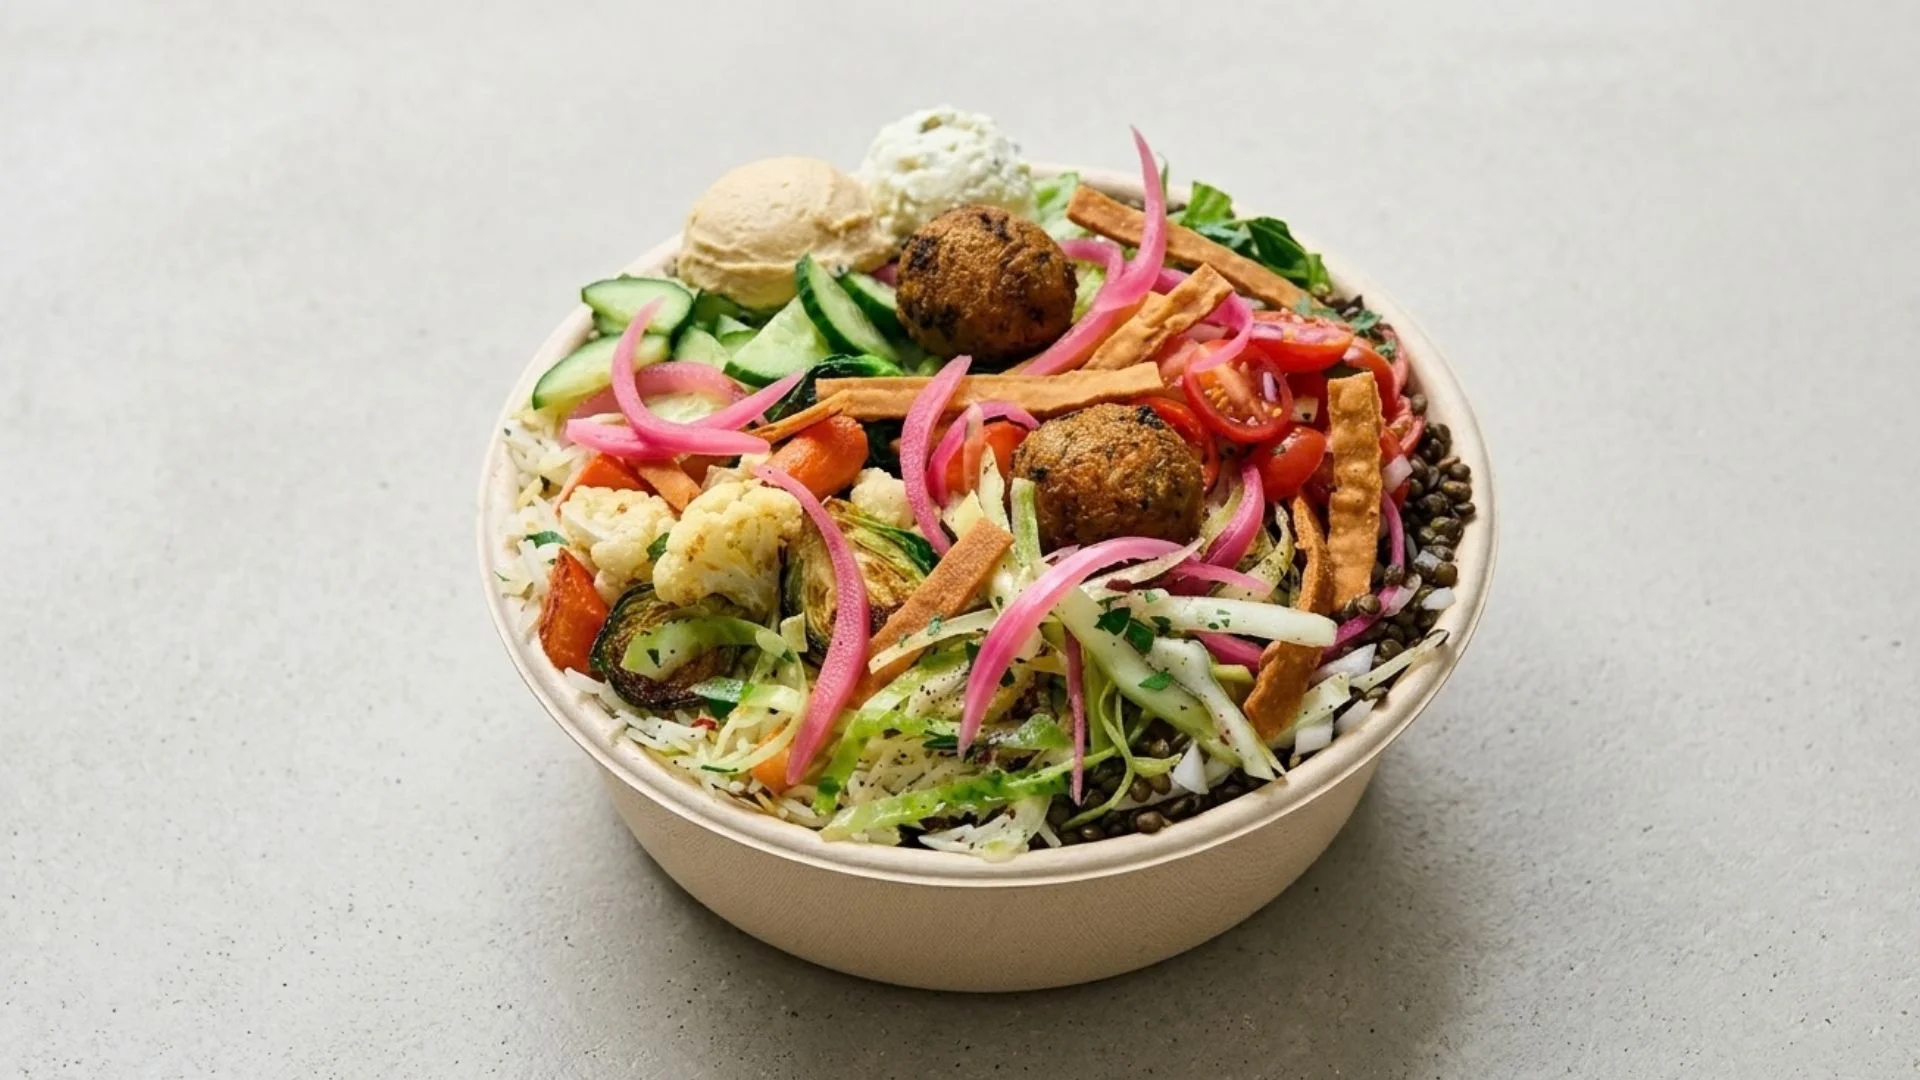
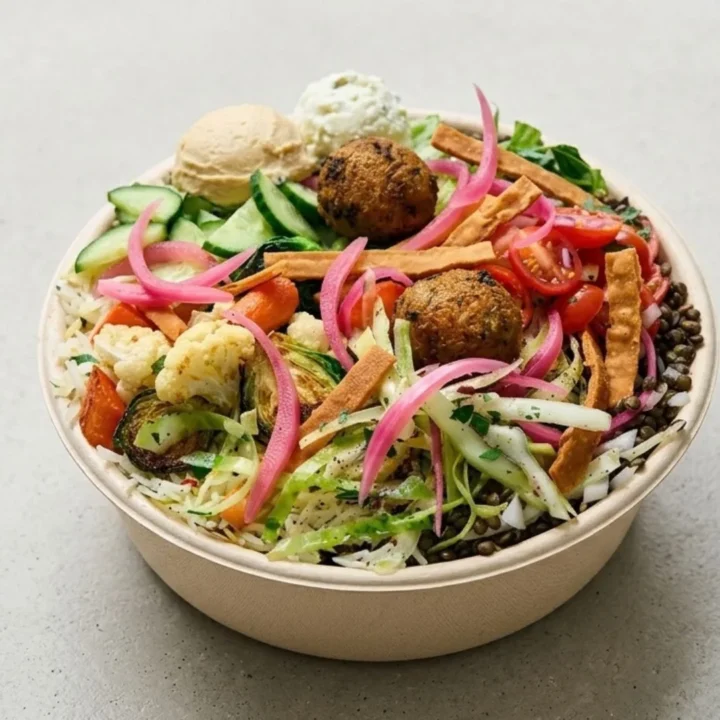
The most popular way to enjoy this cava falafel bowl recipe is, unsurprisingly, in a bowl. Start with a base of fluffy rice, quinoa, or greens, then layer on warm falafel, a scoop of hummus, chopped cucumber and tomato, pickled onions, and a generous drizzle of tahini or garlic sauce for that signature Mediterranean-bowl experience.
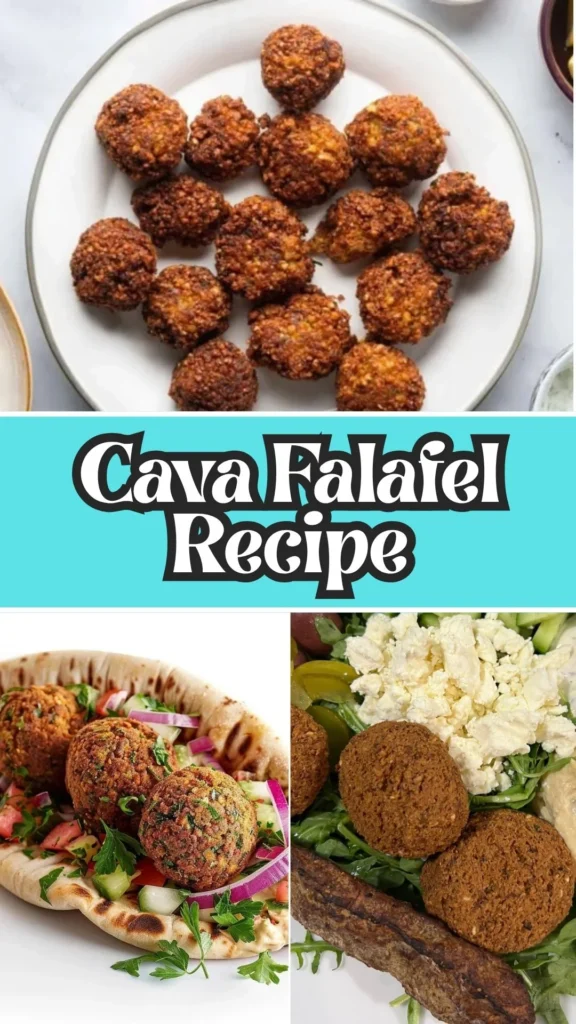
Falafel also shines tucked into warm pita with lettuce, tomato, and a cooling yogurt or tahini sauce for a classic wrap. For a lighter option, crumble falafel over a Greek salad with feta, olives, and a lemony vinaigrette – the crispy edges hold up surprisingly well against dressing. Hosting friends? Serve falafel as an appetizer with a trio of dips: hummus, baba ganoush, and a spicy harissa yogurt.
Leftover falafel can even be crumbled into wraps, grain bowls, or served alongside eggs for a hearty, protein-packed breakfast. However you serve it, the bright herb flavor pairs well with acidic, cooling, and creamy elements that balance its crispy, savory crunch.
How to Store and Keep It Fresh
Cooked falafel keeps well in an airtight container in the fridge for up to 4 days. For longer storage, freeze cooked or uncooked shaped falafel on a tray until solid, then transfer to a freezer bag for up to 3 months.
To reheat, avoid the microwave, which makes them soggy – instead, warm in a 375°F oven or air fryer for 8–10 minutes until crisp and heated through. Frozen uncooked falafel can be fried or baked directly from frozen; just add a few extra minutes to the cook time.
Nutrition Facts and Dietary Notes
A single falafel ball (fried) contains roughly 60–70 calories, with 2–3g protein, 3g fat, and 6g carbs, though baking or air frying lowers the fat content noticeably. This cava falafel recipe is naturally vegan, dairy-free, and can easily be made gluten-free since chickpeas contain no gluten.
Chickpeas also provide plant-based protein and fiber, which support digestion and help keep you full longer. For a lower-sodium version, reduce added salt and rely more on herbs and garlic for flavor.
FAQs About Cava Falafel Recipe
Everything you need to know about Cava Falafel Recipe: common questions answered.
1. Can I use canned chickpeas instead of dried?
No – canned chickpeas hold too much moisture and will produce a mushy mixture that won’t hold together or crisp up properly.
2. Why does my falafel fall apart while frying?
This usually means the mixture wasn’t refrigerated long enough, or the chickpeas weren’t drained and dried thoroughly before processing.
3. Can I bake instead of fry this cava copycat recipe falafel?
Yes – bake at 400°F for 20–25 minutes, flipping halfway, though frying still gives the crispiest exterior.
4. How long should I soak the chickpeas?
A minimum of 12 hours and up to 24 hours; they should double in size and soften but remain uncooked.
5. Can I freeze falafel before cooking?
Yes – shape the falafel, freeze on a tray until solid, then store in a freezer bag and cook directly from frozen when ready.
Cava Falafel Recipe
I’ll be honest – I resisted making my own cava falafel recipe for months, convinced it would never match the real thing. Then one rainy Tuesday, too lazy to drive anywhere, I finally soaked a batch of dried chickpeas overnight just to see what would happen. The next day, standing over my food processor with fistfuls of cilantro, parsley, and dill, my whole kitchen turned into something between a spice market and a garden. When that first falafel hit hot oil and turned deep gold with a shattering crust, I knew I’d cracked it.
Ingredients
- 2 cups dried chickpeas
- 1 teaspoon baking soda (for soaking)
- 1 cup fresh cilantro, roughly torn
- 1 cup fresh parsley, roughly torn
- 1/2 cup fresh dill, roughly torn
- 6–8 cloves garlic, peeled
- 1 small onion, roughly chopped (optional but recommended)
- 1 tablespoon ground cumin
- 1 teaspoon ground coriander
- 1/2 teaspoon cayenne or crushed red pepper (optional)
- 1 1/2 teaspoons baking powder
- Oil for frying
Instructions
- Soak the chickpeas.
Place dried chickpeas in a large bowl, cover with several inches of cold water, and stir in the baking soda. Soak for a minimum of 12 hours, up to 24 hours. They should roughly double in size and soften but stay raw – do not cook them. - Drain and dry.
Drain the soaked chickpeas well and pat them dry with a clean towel to remove excess moisture. - Process the mixture.
Add the chickpeas, herbs, garlic, onion, and spices to a food processor. There’s no need to chop anything finely beforehand – just cut ingredients enough to fit in the bowl. - Pulse to the right texture.
Pulse in short bursts, scraping down the sides as needed, until the mixture looks like a cross between coarse oatmeal and a paste. If it looks crumbly and dry, it’s under-processed; keep pulsing. It’s genuinely hard to over-process this into hummus, so don’t be afraid to run it a bit longer than you think. - Refrigerate the mixture.
Transfer the mixture to a bowl, cover, and refrigerate for at least 1 hour (longer is fine). Do not skip this step – resting lets the mixture hydrate fully, develop flavor, and become sticky enough to hold together. - Stir in baking powder.
Once rested, fold in the baking powder right before you’re ready to shape and cook. - Shape the falafel.
Form the mixture into balls or thick, hockey-puck-style patties – avoid flattening them like thin burgers, since that leads to dry, overcooked falafel. At this stage, you can freeze shaped falafel on a tray for later use. - Cook your falafel.
For the most authentic texture, fry in 2–3 inches of oil heated to 350°F (175°C) for 3–4 minutes, until deeply golden and crisp. Alternatively, bake at 400°F (205°C) for 20–25 minutes, flipping halfway, or air fry at 375°F (190°C) for 12–15 minutes, shaking the basket halfway through. - Drain and serve
Transfer cooked falafel to a paper-towel-lined plate to drain excess oil before serving warm.
Notes
Cooked falafel keeps well in an airtight container in the fridge for up to 4 days. For longer storage, freeze cooked or uncooked shaped falafel on a tray until solid, then transfer to a freezer bag for up to 3 months. To reheat, avoid the microwave, which makes them soggy – instead, warm in a 375°F oven or air fryer for 8–10 minutes until crisp and heated through. Frozen uncooked falafel can be fried or baked directly from frozen; just add a few extra minutes to the cook time.
Nutrition Information:
Yield: 8 Serving Size: 1Amount Per Serving: Calories: 90
And that’s it – your own crispy, herb-packed cava falafel recipe, made completely from scratch at home. Whether you build a full copycat bowl or just snack on them straight from the fryer, this recipe delivers that same craveable flavor without the takeout price tag.
Give it a try this week, and let me know in the comments how your falafel turned out! Looking for more Mediterranean-inspired recipes? Check out the related posts below for more homemade bowl and dip ideas.
We’d love to hear how this recipe turns out for you! Give it a try, then drop a comment below to share your thoughts and tips with us.
You can also follow us on Pinterest, and YouTube for more delicious updates and kitchen inspiration. Your feedback and support mean the world to us!