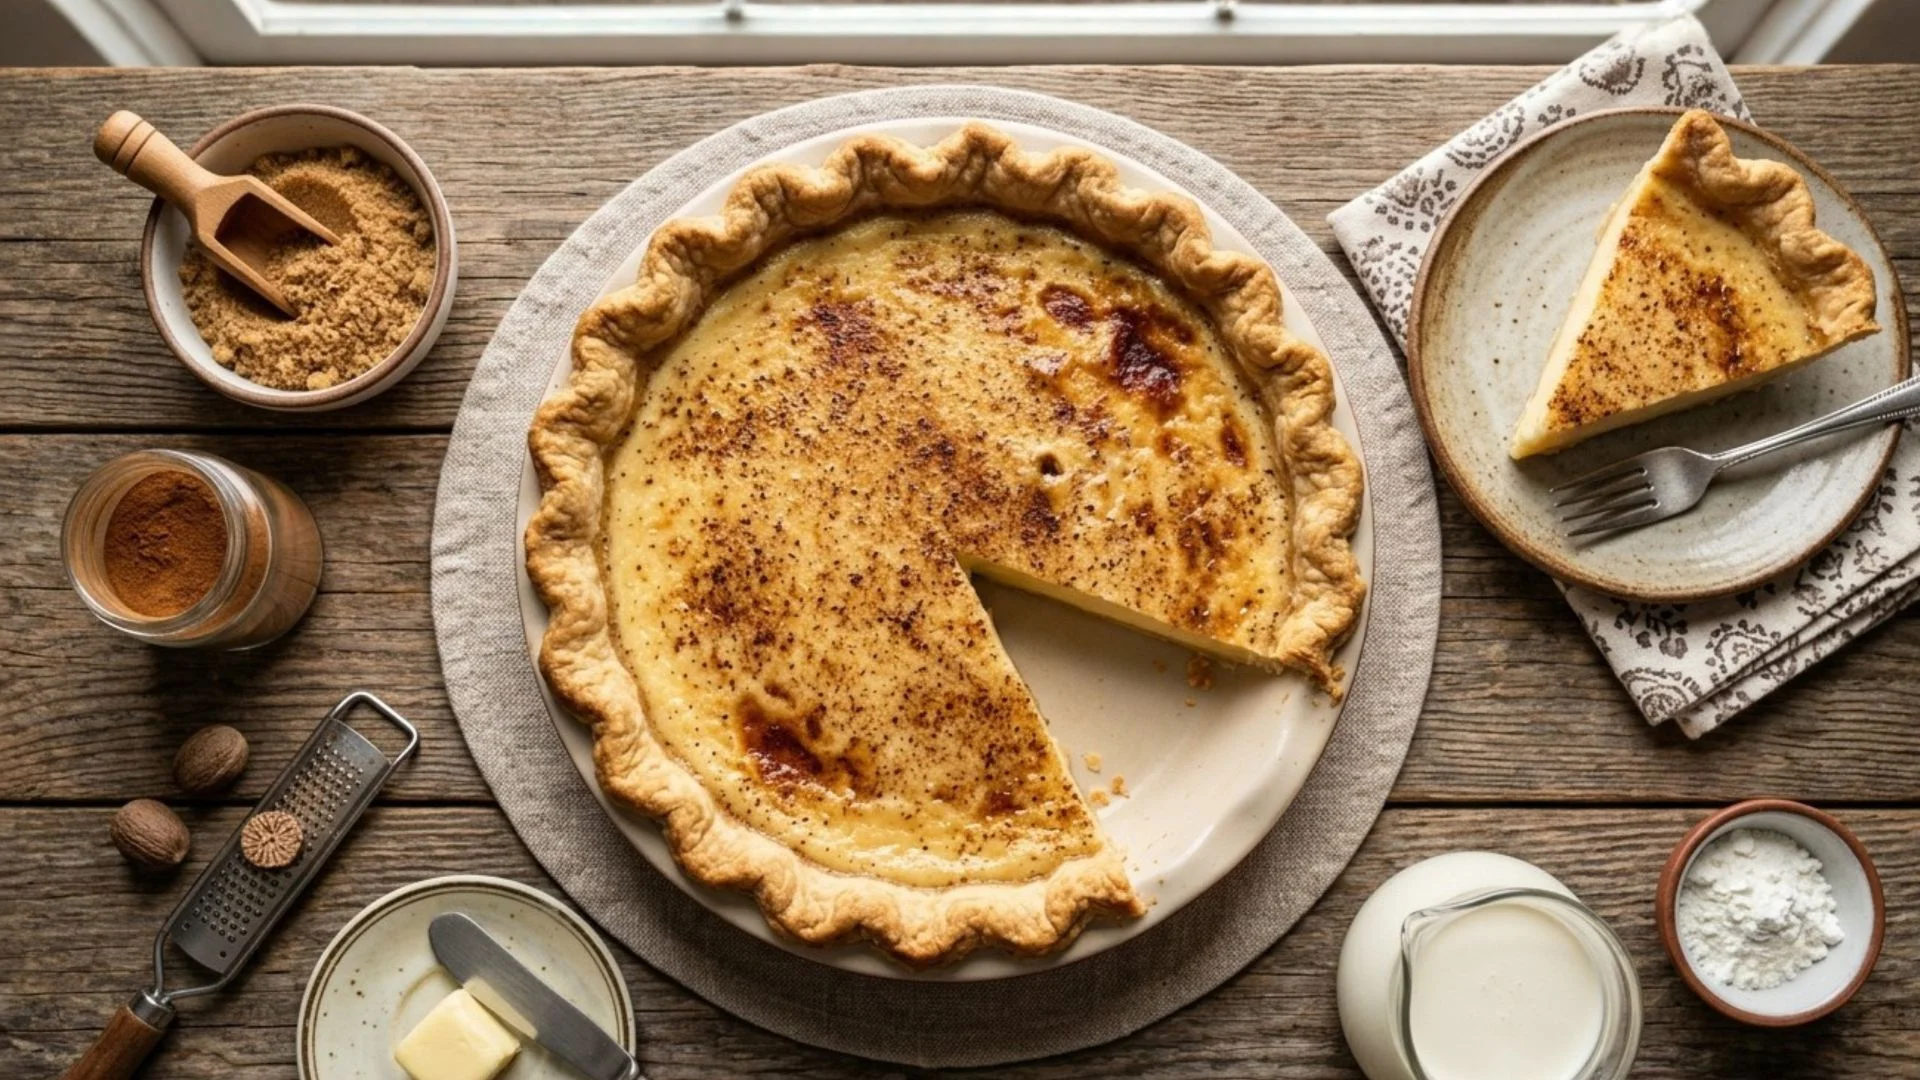
Wicks Sugar Cream Pie Recipe
There’s something about a slice of warm sugar cream pie that instantly feels like home. This wicks sugar cream pie recipe is the kind of dessert that shows up at family gatherings, church potlucks, and Sunday dinners across the Midwest – quiet, unassuming, and completely irresistible.
One bite of that silky, custard-like filling under a caramelized cinnamon-sugar crust, and you’ll understand why it’s earned a permanent spot in so many recipe boxes. What makes this version special is its simplicity.
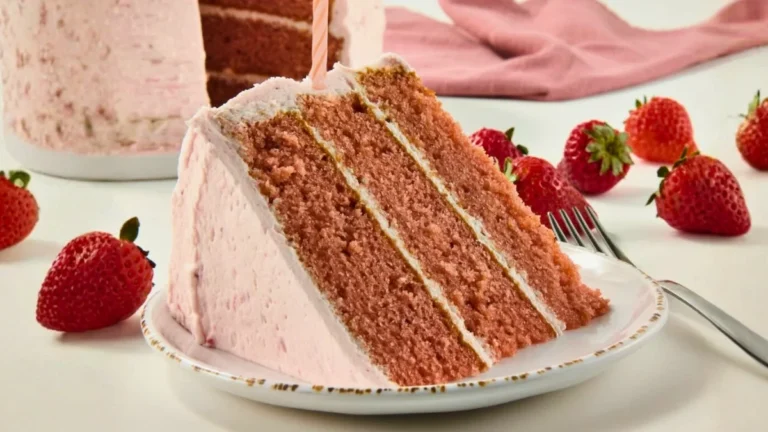
Serve it with Strawberry Cake, Strawberry Cream Shortcake, or Chocolate Cake for a delightful dessert spread that’s perfect for holidays, family gatherings, or any special occasion.
No eggs, no fussy tempering, just a handful of pantry staples transformed into something that tastes far more impressive than the effort it takes. Grab your ingredients – this one comes together faster than you’d expect.
What Is Sugar Cream Pie and Why Do Fans Love It?
Sugar cream pie is a simple custard-style pie made without eggs, relying instead on cream, sugar, and cornstarch to create a rich, silky-smooth filling. The texture sits somewhere between a classic custard pie and a creamy pudding pie, with a flavor that’s warm, buttery, and lightly caramelized thanks to a broiled cinnamon-sugar top.
Compared to pumpkin or pecan pie, this dessert is far less sweet and far more about texture – the filling practically melts on the tongue. Unlike a cream pie topped with whipped cream, this one develops its signature flavor right in the oven, giving it a slightly toasted, brûlée-like finish.
Fans love it because it’s humble yet unforgettable: no complicated techniques, no exotic ingredients, just a handful of staples turned into something that tastes like a well-kept family secret.
The Nostalgic History Behind This Pie
This style of pie has deep roots in Midwestern American baking traditions, particularly in Indiana, where it’s often called the state’s unofficial pie. It emerged from an era when eggs and fresh fruit weren’t always reliably available, so home bakers relied on pantry basics – sugar, flour or cornstarch, and cream – to stretch ingredients into a satisfying dessert.

As eggier custard pies and fruit-based pies became more common and accessible, this simpler cream-based version fell out of everyday rotation, surviving mostly in family recipe boxes and small-town diners.
It’s distinct from newer “cream pies” that rely on pudding mixes or whipped toppings; this version is cooked stovetop into an actual custard base, giving it a denser, more old-fashioned texture that newer imitations rarely replicate.
Key Ingredients That Give This Pie Its Signature Flavor
The magic of this pie lies in just a few ingredients working together perfectly. Heavy cream is the backbone, providing the rich, velvety body that defines the filling – there’s no substitute that delivers the same silkiness. Granulated sugar sweetens the custard while also caramelizing under the broiler for that signature golden top.
Cornstarch acts as the thickening agent, setting the filling into clean, sliceable custard without needing eggs. Unsalted butter, both in the filling and drizzled on top, adds depth and helps the topping crisp and bubble under high heat. Vanilla extract rounds everything out with warmth, while a pinch of salt keeps the sweetness balanced rather than cloying.
Finally, the cinnamon-nutmeg topping is what separates this pie from a plain vanilla custard – that quick trip under the broiler transforms simple spices into a toasty, almost praline-like crust that makes every bite memorable.
Wicks Sugar Cream Pie Recipe Ingredients
Pie Crust
- 1 single, deep-dish pre-baked pie crust (homemade, frozen, or refrigerated) – a deep-dish crust is essential here to hold the generous filling; pre-baking prevents a soggy bottom.
For the Filling
- 4½ tablespoons cornstarch – the thickener that sets the custard; don’t substitute with flour, as it won’t give the same silky texture.
- 1 cup granulated sugar (222g) – for sweetness and caramelization; can be swapped with a granulated sugar substitute in a pinch, though texture may vary slightly.
- 1 pinch of salt – balances sweetness.
- 3 cups heavy cream (24oz / 710ml) – use full-fat heavy cream only; lighter creams won’t set properly.
- 5 tablespoons unsalted butter, cubed (75g) – adds richness; salted butter works if you omit the added pinch of salt.
- 1 tablespoon vanilla extract or vanilla bean paste – vanilla bean paste adds beautiful flecks and deeper flavor.
And for the Topping
- 2 tablespoons unsalted butter, melted – helps the topping crisp under the broiler.
- 1 teaspoon ground cinnamon – for warm spice flavor.
- ¼ teaspoon ground nutmeg – adds a subtle, aromatic depth.
Tools You Need to Make This Recipe at Home
- Medium heavy-bottom saucepan
- Whisk
- Rimmed baking sheet
- Aluminum foil (for shielding crust edges)
- Fine mesh sieve or small sifter (for the spice topping)
- Pastry brush or spoon (for drizzling butter)
Prep Time: 15 minutes
Cook Time: 15 minutes
Chill Time: About 4 hours (or overnight)
Yield: 8 slices
Steps to Make This Wicks Sugar Cream Pie Recipe
1. Prepare the Pie Crust
Bake a deep-dish pie crust according to package directions or your homemade recipe, until lightly golden. Let it cool completely.
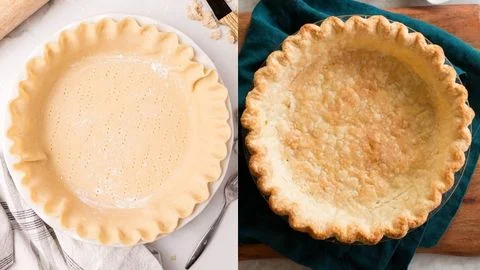
Wrap the outer edges of the crust with foil strips to prevent burning, then place the pie on a rimmed baking sheet.
2. Prepare the Filling Base
In a medium heavy-bottom saucepan, whisk together the cornstarch, sugar, and pinch of salt.
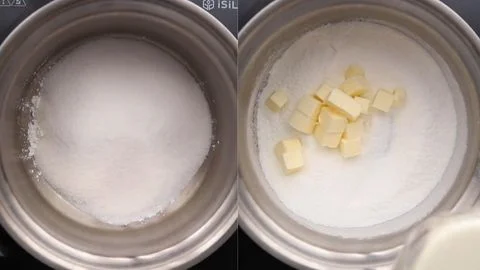
Add the heavy cream and cubed butter to the saucepan.
3. Cook the Filling
Cook over medium heat, whisking constantly, until the mixture thickens and begins to boil.

Continue cooking for 1 more minute, then remove from heat.
4. Finish and Pour the Filling
Stir in the vanilla extract until fully combined.
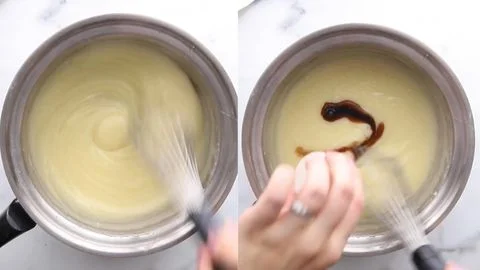
Pour the filling into the pre-baked crust and gently jiggle the pan to level it out.
5. Rest and Prepare for Broiling
Let the pie rest at room temperature for 15–30 minutes.

Move the oven rack to about 6 inches from the broiler and preheat the broiler.
6. Top, Broil, Chill, and Serve
Drizzle melted butter evenly over the filling, tilting the pan to spread it. Mix the cinnamon and nutmeg together, then sift generously over the top. Broil the pie, watching closely, until the topping bubbles and turns golden brown (this happens fast).
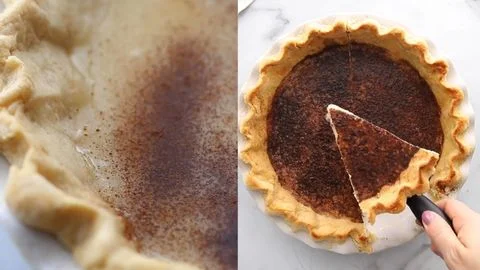
Cool completely at room temperature, then refrigerate at least 4 hours or overnight until fully set. Slice with a warm knife for clean cuts, and enjoy.
Pro Tips for Getting the Flavor Just Right
The biggest mistake bakers make with this pie is rushing the stovetop step. The filling needs to reach a full, steady boil while being whisked constantly – if you pull it too early, the cornstarch won’t fully activate, and your pie won’t set properly, no matter how long it chills.
Watch the broiler like a hawk. Sugar and butter caramelize quickly under high heat, and the line between golden-brown and burnt is a matter of seconds. Keep the oven door cracked and stay right in front of it. Don’t skip the resting period before broiling – pouring hot filling straight under the broiler leads to uneven bubbling and a filling that hasn’t started to set.

Patience during chilling matters just as much as the cooking. Cutting into the pie too early results in a runny, unset center. A full four hours – or better yet, overnight – ensures clean, custard-like slices. Finally, always slice with a warm, clean knife (run it under hot water and wipe dry between cuts) for that bakery-style presentation.
Easy Variations to Customize This Pie
While the classic version is a showstopper on its own, small tweaks can make it your own. Swap the cinnamon-nutmeg topping for a touch of cardamom or allspice for a warmer, spiced twist.
Add a splash of bourbon or maple extract to the filling for a deeper, cozier flavor profile. For a fun texture contrast, sprinkle finely chopped toasted pecans over the broiled topping before it fully cools. If you love citrus, a bit of orange zest stirred into the filling brightens the richness beautifully.
However you customize it, keep the cream-to-cornstarch ratio consistent so the pie sets correctly.
Best Ways to Serve This Pie in Your Meals
This pie shines best served chilled, straight from the refrigerator, letting the custard filling hold its clean slice while the caramelized topping adds a satisfying contrast in texture. A dollop of freshly whipped cream on top enhances the richness without overwhelming it, and a light dusting of extra cinnamon ties the flavors together beautifully.
For a cozy fall or winter dessert table, pair a slice with a warm cup of coffee or spiced chai – the warmth of the drink balances the pie’s cool, creamy texture. It also makes a lovely addition to holiday spreads alongside pumpkin or pecan pie, offering guests a lighter, less overly sweet option.
If you’re hosting a potluck, this pie travels well once fully chilled and set, making it a stress-free make-ahead dessert. For a modern twist, serve small slices alongside fresh berries or a berry compote to add a touch of brightness against the rich custard filling.
How to Store and Keep It Fresh
Store the pie covered in the refrigerator for up to 4 days, as the cream-based filling requires constant chilling to stay fresh and set. Avoid leaving it at room temperature for more than an hour.

This pie isn’t ideal for freezing, since the custard texture can become watery once thawed. It’s best enjoyed cold and isn’t typically reheated – if you prefer it slightly warmed, let a slice sit at room temperature for 10–15 minutes before serving.
Nutrition Facts and Dietary Notes
Each slice (based on 8 servings) contains roughly 420–460 calories, largely from the heavy cream and butter in the filling. This recipe is naturally gluten-free if paired with a gluten-free pie crust, and can be made lower in sugar using a granulated sugar substitute.
It is not naturally vegan, though dairy-free heavy cream alternatives and vegan butter can be used with some texture variation. In moderation, this dessert offers a comforting treat rich in calcium from the dairy content.
FAQs About This Wicks Sugar Cream Pie Recipe
Find clear answers to the top questions about Wicks Sugar Cream Pie Recipe.
Can I make this pie ahead of time?
Yes – it’s best made a day ahead, since it needs at least 4 hours to chill and fully set.
Why is my filling runny?
The mixture likely wasn’t boiled long enough on the stovetop or didn’t chill long enough afterward.
Can I use a store-bought crust?
Absolutely – a frozen or refrigerated deep-dish crust works perfectly and saves time.
Do I have to broil the topping?
Broiling creates the signature caramelized crust, but you can skip it for a simpler, un-broiled version.
Can I freeze this pie?
It’s not recommended, as the creamy filling tends to separate and turn watery after thawing.
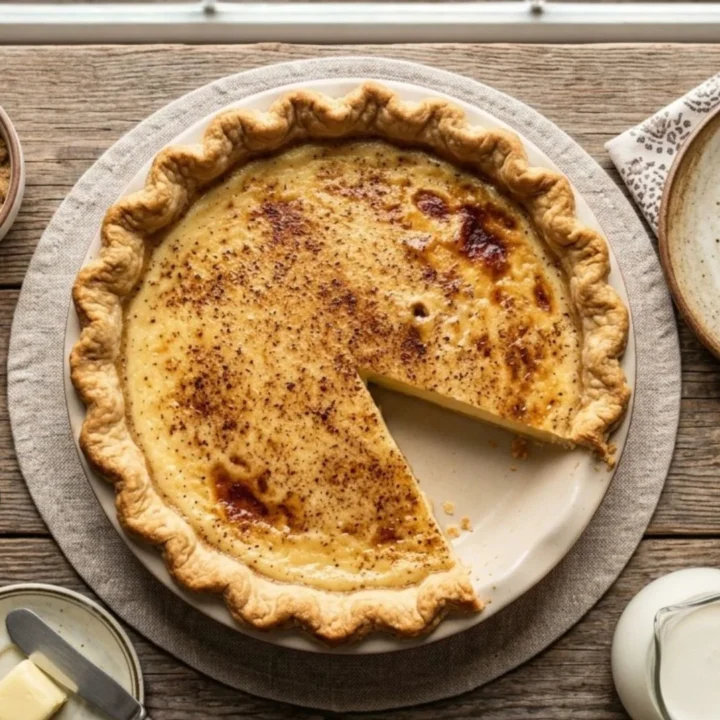
Wicks Sugar Cream Pie Recipe
There’s something about a slice of warm sugar cream pie that instantly feels like home. This wicks sugar cream pie recipe is the kind of dessert that shows up at family gatherings, church potlucks, and Sunday dinners across the Midwest – quiet, unassuming, and completely irresistible. One bite of that silky, custard-like filling under a caramelized cinnamon-sugar crust, and you’ll understand why it’s earned a permanent spot in so many recipe boxes. What makes this version special is its simplicity.
Ingredients
- 4½ tablespoons cornstarch
- 1 cup granulated sugar (222g)
- 1 pinch of salt – balances sweetness.
- 3 cups heavy cream (24oz / 710ml)
- 5 tablespoons unsalted butter, cubed (75g)
- 1 tablespoon vanilla extract or vanilla bean paste
- 2 tablespoons unsalted butter, melted
- 1 teaspoon ground cinnamon
- ¼ teaspoon ground nutmeg
Instructions
- Prepare the Pie Crust
Bake a deep-dish pie crust according to package directions or your homemade recipe, until lightly golden. Let it cool completely. Wrap the outer edges of the crust with foil strips to prevent burning, then place the pie on a rimmed baking sheet. - Prepare the Filling Base
In a medium heavy-bottom saucepan, whisk together the cornstarch, sugar, and pinch of salt. Add the heavy cream and cubed butter to the saucepan. - Cook the Filling
Cook over medium heat, whisking constantly, until the mixture thickens and begins to boil. Continue cooking for 1 more minute, then remove from heat. - Finish and Pour the Filling
Stir in the vanilla extract until fully combined. Pour the filling into the pre-baked crust and gently jiggle the pan to level it out. - Rest and Prepare for Broiling
Let the pie rest at room temperature for 15–30 minutes. Move the oven rack to about 6 inches from the broiler and preheat the broiler. - Top, Broil, Chill, and Serve
Drizzle melted butter evenly over the filling, tilting the pan to spread it. Mix the cinnamon and nutmeg together, then sift generously over the top. Broil the pie, watching closely, until the topping bubbles and turns golden brown (this happens fast). Cool completely at room temperature, then refrigerate at least 4 hours or overnight until fully set. Slice with a warm knife for clean cuts, and enjoy.
Notes
Store the pie covered in the refrigerator for up to 4 days, as the cream-based filling requires constant chilling to stay fresh and set. Avoid leaving it at room temperature for more than an hour.
This pie isn’t ideal for freezing, since the custard texture can become watery once thawed. It’s best enjoyed cold and isn’t typically reheated – if you prefer it slightly warmed, let a slice sit at room temperature for 10–15 minutes before serving.
Nutrition Information:
Yield: 12 Serving Size: 1Amount Per Serving: Calories: 80
And there you have it – a rich, nostalgic dessert that’s proof simple ingredients can create something truly special. If you try this recipe, I’d love to hear how it turned out! Drop a comment below with your tips, tweaks, or questions.
And if you’re craving more comforting classics, be sure to check out our other pie and dessert recipes for your next baking adventure. We’d love to hear how this recipe turns out for you! Give it a try, then drop a comment below to share your thoughts and tips with us.
You can also follow us on Pinterest, and YouTube for more delicious updates and kitchen inspiration. Your feedback and support mean the world to us!